
How To Make A MiniSig Using Adobe Photoshop
Here is a tutorial on how to make a MiniSig:
Step 1:
Create a new 350x20 file and fill it with a light grey colour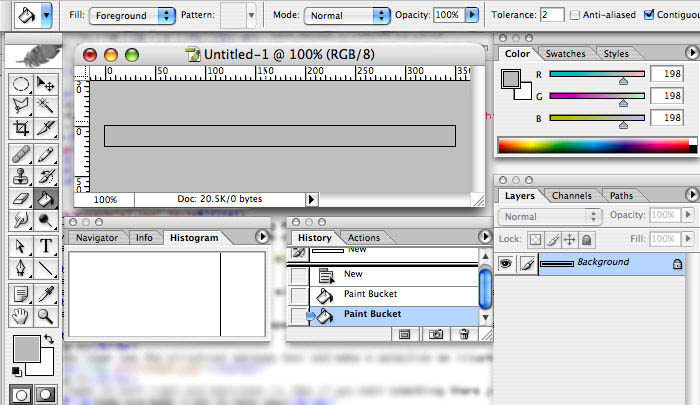
Step 2:
Make a new layer ( ⇧ ⌘ N ) and, using white and transparent as colours, shade a gradient where the white is at the top and the transparent is at the bottom. When making the gradient, start with the cross-hairs about 30% higher than the height of the image and descend (crossing the image entirely) to end up with the cross-hair/line on the bottom border of the image. This gives a slightly "softer" gradient (which will be "layer 1").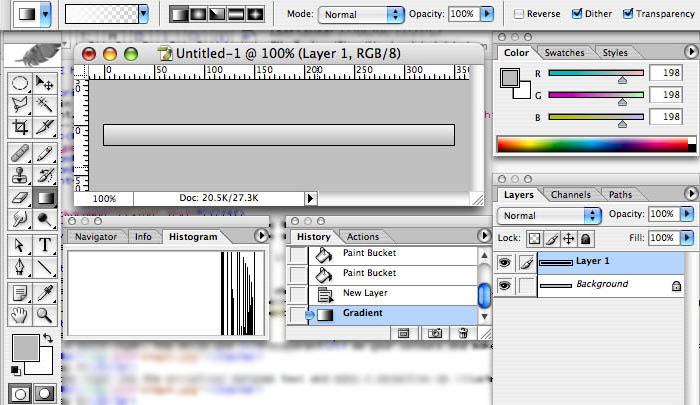
Step 3:
Now make another layer. Using the same colours make another gradient where the white is at the top, transparent at the bottom. This time, start with the cross-hairs precisely at the top of the image and descend (crossing the image entirely) to end up with the cross-hair/line on the bottom border of the image. This gives a "harsher" gradient (which will be "layer 2").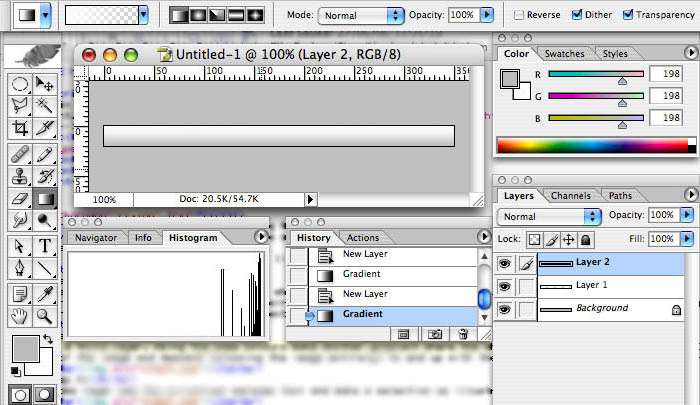
Step 4:
On the same layer 2, use the elliptical marquee tool and make a selection as illustrated below and press delete... you now have a 3D-ish feel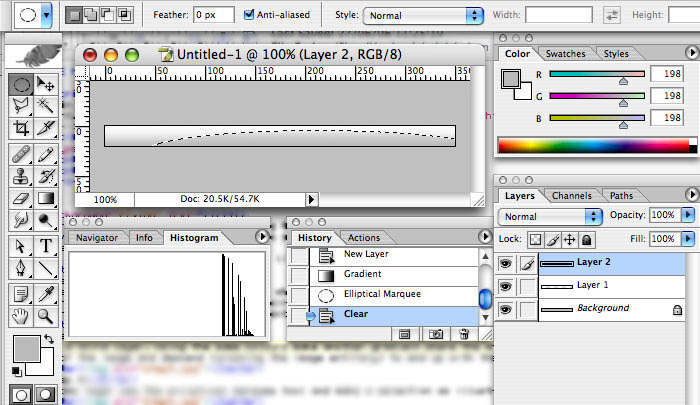
Step 5:
Just above the background base-layer, create a new text layer and write what you want on your image. I use a small white font with background drop-shadow set to {Distance 0, Spread 10, Size 10}. I have used Arial Narrow here, but the most common font used in personal userbars is actually Visitor TT1 (BRK).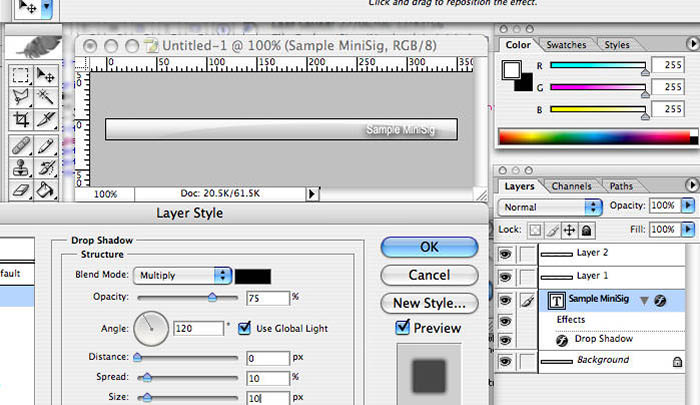
Step 6:
An optional extra is to create a 1 pixel border around the edge, if you wish. Do this on a new layer placed above all the others (uppermost). I use the rectangular marquee tool to "cordon off" single pixel width lines and fill them with a dark colour.
Step 7:
Finally, you need to create a hatch pattern for the background. Do this by creating a new 4x4 pixel image, 72 res & 8-bit RGB, with a transparent background. Now zoom in to 1600% and, using the pen (not brush) tool of 1 pixel size, draw a black diagonal corner to corner (see left image). Now Go into Edit → Define Pattern... and give it a name (I called mine "Wider Hatch"). Now go into the background Layer Style of your minisig and click on Pattern Overlay and choose the pattern you just created. As you can see from the right image, I have created about 4 of my own. After choosing, remember to reduce the opacity of the pattern to something like 20-30% as it looks better this way. Your minisig will now have a hatched appearance.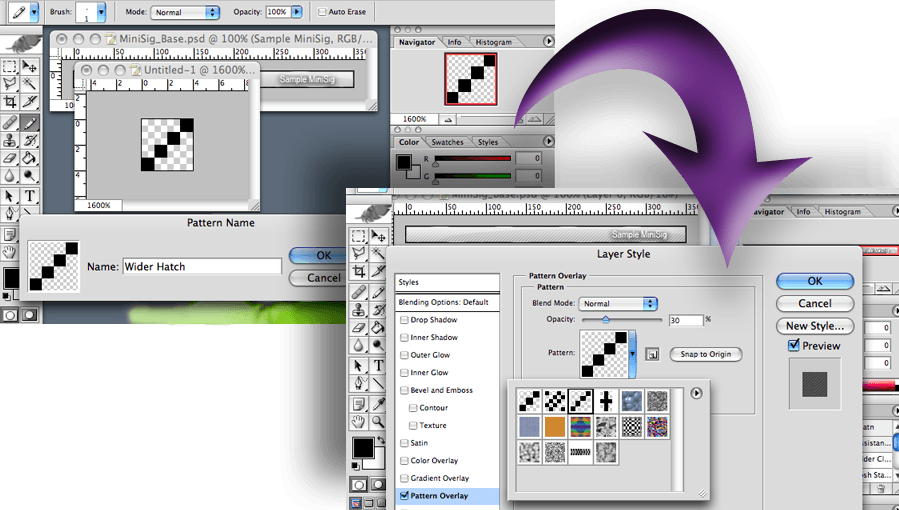
Step 8:
Save your .psd file and keep it safe, you've finished. Now all you need to do is fill the background base-layer with any colour you choose and alter the text layer to any words you want. Adding images should be done in a new layer adjacent to the text layer (below it is fine). Saving your finished MiniSigs as .png/.bmp/.jpg/.gif files allows for web use.Some pre-made files to help you:
Here is my pre-made base templateHere are some of my own MiniSigs, combined into single animated .gif files (as you can see from the second one, slight changes to the "Glass" layer and the background's "hatch overlay pattern" can be utilised to great effect):
Drag and drop this onto your desktop (or right click if you're a Windows user).
Hope this helps 😊.
Back to my Various Webinfo page ?
13th February 2006
