
Some Raspberry Pi Stuff
I now own this extremely versatile computer for the ridiculous price of £35. Yes, I've finally succumbed and joined the Pi brigade with a Raspberry Pi model B rev 2 (512MB RAM). The Pi has been used in many projects around the world owing to it's ease of programming and hordes of talented folk out there with the ability to learn how to program. This leaves plenty of room for us normal folk to use their opensource ideas 😝.
The few things that I've done include:
- Heatsinks over the USB controller, CPU and Voltage Regulators
- Installed it into a clear case
- Added an 8Gb SD card
- Overclocked to Raspberry Pi 2 spec
- Added a micro-switched Keyboard
- Added a RF remote for use with XBMC media server
- Added a portable 2A powerbank to act as a UPS
- Added a proper 2.4A wall power plug
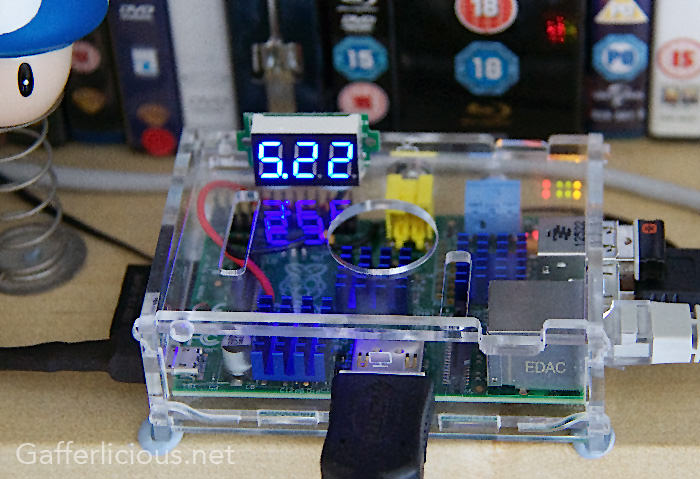
- Added a VoltMeter for continuous power readings (should stay >4.7V)
Install Raspbian onto an SD card in Terminal
Currently there are three versions of Raspbian, FULL (base install + desktop environment + lots of pre-installed apps), DESKTOP (base install + the desktop GUI) and LITE (just the base install with no GUI or apps). This last one is what you need as you're not going to run this via a display but instead online like a server with all your input via SSH (FTP). The other benefit is that the former 2 require an 8GB card minimum whereas the LITE version only can run on a 4GB card if that's all you have (card should be formatted to FAT32).- Open Terminal
- Without the card in your computer’s SD card reader, type df -h. The df program shows your free space, but it also shows which disk volumes are mounted.
- Now insert the SD card and run df -h again.
- Look at the list of mounted volumes and determine which one is the SD card by comparing it to the previous output. For example, the SD card mounts on my MBP as /Volumes/RASPBIAN, and the device name is /dev/disk2s1. Depending on the configuration of your computer, this name may vary so write the card’s device name down.
- To write to the card you’ll have to unmount it first. Unmount it by typing sudo diskutil unmount /dev/disk2s1 (using the device name you got from the previous step). Note that you must use the command line or Disk Utility to unmount. If you just eject it from the Finder you’ll have to take it out and reinsert it (and you’ll still need to unmount it from the command line or Disk Utility). If the card fails to unmount, make sure to close any Finder windows that might be open on the card.
- Next you’ll need to figure out the raw device name of the card. Take your device name and replace disk with rdisk and leave off the s1 (which is the partition number). For example, the raw device name for the device /dev/disk2s1 is /dev/rdisk2. It is really important that you get the raw device name correct! You can overwrite your hard drive and lose data if you start writing to your hard drive instead of the SD card. Use df -h again to double check before you continue if you want to be sure.
- Make sure that the downloaded image is unzipped and sitting on your desktop (or wherever you want - drag it to terminal window to check the address, I've inserted mine as an example in the one below). You’ll be using the Unix utility dd to copy the image bit by bit to the SD card. Below is the command; just replace the names with your ones. You’re essentially telling dd to run as root and copy the input file (if) to the output file (of).
sudo dd bs=1m if=/Users/Gafferlicious/Desktop/2019-07-10-raspbian-buster-lite.img of=/dev/rdisk2 - It will take a few minutes to copy the whole disk image. Unfortunately dd does not provide any visual feedback, so you’ll just have to wait. When it’s done it will show you some statistics
- Add an empty file called ssh (i.e. no file extension - you can use textedit to create one) to the root of the card (this allows ftp into it)
- Eject the SD card and you’re ready to try it on the Pi.
Connect up the Pi
You'll need a CAT5 cable (the Model B ethernet port is only capable of 100MBps) to attach the Pi to a spare ethernet port on your router. You'll need the SD card correctly formatted as a Boot Card via the above. You'll need a minimum 5V 0.7A power supply for the model B rev 2 but I would recommend higher for stability (closer to 1.8A especially if overclocking).For first run you also need a screen/TV with HDMI and a keyboard for intial setup and to enable things like FTP to work.
Boot Raspbian first time, change username/password and system config
With the SD card in the Pi, turn it on.The loader will automatically take you through some basic settings such as keyboard type and ask you to change your username and account password. Choose whatever you need and press enter. It will reboot and get you to the logon prompt where you can type in the username and password you just chose to login. Now you need to manually run config from the command line:
sudo raspi-config
Firstly go to Advanced Options (6) → Expand The Filesystem (1) to allow whole sd card to be used.
If you are tempted to go to Performance Options (4) → Overclock (1) to change the clock speed of the CPU - note that I previously had mine on 'Turbo' (1GHz) which is fine for certain programs like MAME but if aiming to keep the Pi running 24/7, overclocking will introduce more and more errors to it's writing onto the sd card until you end up in a situation where you can no longer log in or even boot the device. Staying closer to 'standard/none' will provide long term stability and longevity so I have settled on 'Mediium' which overclocks from 700MHz to 900MHz (equivalent to a Raspberry Pi 2) - see below for testing this.
If you go into the Interface Options (3) → SSH (2) you can enable it as it's otherwise off by default.
For convenience you can go to System Options (1) → Auto Login (5) to set the Pi to do that when booting up as well.
You can review all the options if you wish to change other paramters too. When you have finished everything it should exit so then type sudo reboot.
Update the OS and the device drivers
Once rebooted it's time to update the Operating System to the latest build:sudo apt-get update && sudo apt-get dist-upgrade -y && sudo apt-get autoremove -y && sudo apt-get clean
The 'dist-upgrade' part will take a long time on first run (45min for me) but be patient (subsequent upgrades will be quicker) and 'dist-upgrade' is prefential to 'full-upgrade' or just 'upgrade' as 'full' will also pick up any dependancy changes that have been made but 'dist' is even better as it will intelligently handle changing dependencies and upgrade the most important packages over the minor ones if there is any conflict. The autoremove command will remove packages that are no longer needed whilst the clean will delete the temporarily downloaded packages (the -y tags answer "yes" for you).
If you want you can also update the Pi kernel/firmware using sudo rpi-update but ***BEWARE*** Some kernel updates will be VERY buggy and may even fail booting. If this happens, to return to a previous stable kernel, go to https://github.com/Hexxeh/rpi-firmware/commits/master and choose the kernel you want, then add that commit key to this command to return to it sudo rpi-update KEY (obviously replace KEY with the code you just got from github).
Test your overclock for safety
After overclocking you should ideally add a heatsink to the ARM SOC to allow better heat dissipation. Once done, you must adequately test your overclocking settings to see how far you can push the Raspberry Pi before it starts to hit its limit and freeze and/or cause read/write issues. The following script will test multiple factors such as maxing out the CPU by putting the it under heavy load at your max overclock speed, testing the read ability on the SD Card (which tests the RAM's ability to sustain it's clock rate and ensures the I/O interface has no issues) and ensuring the SD Card won't get corrupted by writing 512Mb to it multiple times. Firstly, create a script to use:nano stresstest.sh
...and then write the following to the file:
#!/bin/bash
Once done, save and exit with CTRL-X, Y, ENTER and then the following to allow permissions:
chmod +x stresstest.sh
Now run the script (can take a very LOOOONG time to complete - you'll need to be patient here) with:
./stresstest.sh
If you overclocked too much, this may crash your Pi. Alternatively, it may complete but reveal other errors due to the overclock. First it will show you the CPU speed followed by the temp. For the temp, the first 2 digits are what you need and should be in the 45 degC region. Anything over 62 deg may indicate issues and I would advise throttling back a bit. After this, dmesg will regurgitate a host of info from the kernel. Pay attention to any errors here as it may indicate instability. If none are reported, you're good to go. As you probably won't need this script again, you can go ahead and remove it now:
rm stresstest.sh
ip route | grep default | awk '{print $3}'
Should be something like 192.168.1.1 and should be the same as the gateway address.
# Example Static IP Configuration
The second line is the static IP address you've chosen (I chose 192.168.1.150). You use the Router address you found above to fill in the fourth line and also copy it to the fifth line - the last 4 digit 1s are Cloudflare's DNS service as a secondary (much faster than Google's). Note that the third line remains commented out.
If you now save the file and reboot the Pi, it should be assigned the static IP you chose, in this case 192.168.1.150, so you will now use this to login via Terminal:
***NOTE*** Latest builds of Raspbian have removed the DHCP server as it's believed it is better to dictate fixed IPs at the router level not the host level. This being the case, you may find it easier to login to your router and simply assign the IP there in it's admin pages.
curl -Lo log2ram.tar.gz https://github.com/azlux/log2ram/archive/master.tar.gz
Now change the RAM size to suit, default is 40M, I plan on having multiple packages installed/using it so changed mine to 100M by editing the config file with sudo nano /etc/log2ram.conf. Save the file (CTRL-X, yes, ENTER).
sudo nano /etc/logrotate.d/rsyslog
You'll find a scripted list of commands. Change rotate 4 to rotate 2 (the number of log files to keep after rotation, we're going from 4 to 2) and change weekly to daily (how often you want to rotate the log files, we're going from default every week to every day). Save the file (CTRL-X, yes, ENTER), then reboot with the sudo reboot command.
***NOTE*** This is really only useful for SD card usage (if you are running off a spinning HDD you don't need it) but if you have a really old Pi with limited RAM it will hog that resource so is probably better for newer Pi's. If you ever wish to pause or stop the syslogs from being written, type sudo systemctl disable rsyslog.
sudo apt install samba samba-common
The installer will ask if you want to install it, choose Yes and press Enter. Next you have to figure out the mount point of the drive. Type:
lsblk
...and you will see a list of attached drives, one being your SD Card and the other being the attached USB drive. It will usually be called sda or sdb or sdc etc (depending on how many are attached). If the drive you've connected is partitioned it will sublist the partitions as (for example) sda1, sda2, sda3 etc. Choose the partition with your media on it (in my case sda2 but if you have no partitions you would use just sda). Now you need to mount that drive (i'll use sda2 as in my example) in the rpi OS, so first create a new mount point:
sudo mkdir /mnt/usb
You could use anything you want here as you are creating the directory from scratch, e.g. /drive/mymedia or maybe /stream/hdd so I will use /mnt/usb for my mount point. Now you need to change permissions to allow you to access it and then mount the drive to make it available to the OS:
sudo chown -R username:username /mnt/usb
...again, using your own username that you use to log in to your Pi in place of username. If you want to automatically mount on boot, you'll need to open and edit the fstab file with this:
sudo nano /etc/fstab
...and then append this to the end before saving/exiting the editor:
/dev/sda2 /mnt/usb auto defaults,user 0 1
Finally, you need to edit the SMB configuration file to share your drive over Samba by typing:
sudo nano /etc/samba/smb.conf
Then, from the command-line text editor that appears, use your arrow key to scroll to the bottom of the document. You'll want to add a block of text that looks something like this:
[MyMedia] (or whatever you've called your HDD)
0775 are basically the permissions, in this case the Owner can read/write/execute (first 7) whilst the Group can also read/write/execute (second 7) whilst Others can only read/execute but not write (last number 5).
sudo smbpasswd -a username
Yet again using your own username used to log in to your Pi. It will prompt you to now create a unique password just for use with Samba (i.e. it doesn't have to be the same as your user password on the Pi itself) and press Enter.
sudo apt-get install build-essential fakeroot debhelper -y
To check it works, type sudo hd-idle -i 0 -a sda -i 300 -d and you shuld see output like this probing sda: reads: 2759, writes: 0 appear (you'll have to use Ctrl+C to stop the process). Now you want this to be automatic so alter the config file:
sudo nano /etc/default/hd-idle
...to change the first line to this:
START_HD_IDLE=true
...and the last line to this:
HD_IDLE_OPTS="-i 0 -a sda -i 600"
CTRL-X, yes, ENTER to save and then restart the service:
sudo service hd-idle restart && cd..
This will spin the HDD down after 10 minutes of non-use whilst the second part puts you back to the top level command line.
nano cpustats.sh
You should end up with an empty script, so add this block of text into it:
#!/bin/bash
As usual CTRL-X, Y, ENTER to save and exit. Now alter ownership to allow you to run it:
chmod +x cpustats.sh
...and that's it. You can run the script using the following command:
./cpustats.sh
It will give you the CPU temperature and voltage as well as processor speeds and GPU temperature.
sudo shutdown -h now
This will allow a safe shutdown after which you can unplug the Pi.
diskutil list
You should see a list of attached volumes. The one you want is the size of the RPi's card in the correct FAT32 format. It will be named /dev/disk* where * is the number given to your card. To create an exact disk image of the card, type:
sudo dd if=/dev/disk* of=/Users/Username/Desktop/raspberrypi.dmg
Obviously replace Username with yours and * with your number (you might be asked for your laptop password). This may take some time with no indication of progress but be patient, the mac is creating the disk image on your desktop. Once completed you'll see some stats appear. You can now safely eject the Rpi's card and place your donor card (FAT32/MBR formatted) in. Again, type diskutil list to confirm the number and then unmount the card using the following (again, replacing * with your number):
diskutil unmountDisk /dev/disk*
Once unmounted simply type this to put the image back from the desktop onto the new card:
sudo dd if=/Users/Username/Desktop/raspberrypi.dmg of=/dev/disk*
This will probably take just as long so be patient and let it run it;s course.
8th May 2014
#Test from https://elinux.org/RPiconfig
#Overclock_stability_test
#Simple stress test for system. If it survives this, it's probably stable.
#Free software, GPL2+
echo "Testing overclock stability..."
#Max out all CPU cores. Heats it up, loads the power-supply.
for ((i=0; i<$(nproc --all); i++)); do nice yes >/dev/null & done
#Read the entire SD card 10x. Tests RAM and I/O
for i in `seq 1 10`; do echo reading: $i; sudo dd if=/dev/mmcblk0 of=/dev/null bs=4M; done
#Writes 512 MB test file, 10x.
for i in `seq 1 10`; do echo writing: $i; dd if=/dev/zero of=deleteme.dat bs=1M count=512; sync; done
#Clean up
killall yes
rm deleteme.dat
#Print summary. Anything nasty will appear in dmesg.
echo -n "CPU freq: " ; cat /sys/devices/system/cpu/cpu0/cpufreq/scaling_cur_freq
echo -n "CPU temp: " ; cat /sys/class/thermal/thermal_zone0/temp
dmesg | tail
echo "Not crashed yet, probably stable."
Set up a static IP
Find the Router address within the Pi terminal:
Now alter the dhcp config file with sudo nano /etc/dhcpcd.conf and under "# Example Static IP Configuration" remove the # from some of the lines thus:
interface eth0
static ip_address=192.168.1.150/24
#static ip6_address=ed62:13d8:acce:f92e::ff/64
static routers=192.168.1.1
static domain_name_servers=192.168.1.1 1.1.1.1
ssh username@192.168.1.150
using your own username and password you assigned during the initial setup at the beginning (remember to logout from Terminal using exit rather than just closing Terminal).
Install Log2RAM
To avoid multiple log files being continuously written to the SD card (theoretically shortening it's life), log files can instead be written to a dedicated portion of RAM instead and only occasionally copied to the SD card. As per GitHub instructions, type these commands one at a time to install:
tar xf log2ram.tar.gz
cd log2ram-master
chmod +x install.sh && sudo ./install.sh
cd ..
rm -r log2ram-master
Finally, you'll want to amend logrotate to log when you want using this command:
Install Samba for File Sharing
If you have an existing HDD filled with media that you want to share over your network, you can use Samba to turn it into a NAS drive on the Pi. In order to stream a 4K video at 60Hz with 7.1 audio you only need about 50Mbps speed on average, so it would seem that the 10/100 ethernet port is plenty capable enough. However, the max bitrate can spike to up to 200Mbps so even though 10/100 ethernet is fine for 4K streaming most of the time, you can occasionally get drop outs and stuttering. To achieve flawless streaming of 4K 7.1 100% of the time you should really be using gigabit ethernet which will cap out at about 300Mbps (inc. overheads) due to the USB 2.0 port limitation on the Pi. Please IGNORE the multiple tutorials on the internet claiming that you have to reformat your drive and lose all the data to start afresh - you don't, you can simply use an existing drive and set the Pi up to broadcast it as a shared drive without losing any existing data. Now Raspbian doesn't come with Samba installed by default, so you'll need to install it with the following commands:
sudo mount /dev/sda2 /mnt/usb -o uid=username,gid=username
comment = shared folder
path = /mnt/usb
browseable = yes
writeable = yes (or 'no' if you just want to view files)
only guest = no
create mask = 0775
directory mask = 0775
public = yes
guest ok = no (this disables guest access i.e. you need to enter username and password you set below for access)
When you're done, press Ctrl+X to exit nano, pressing y and Enter when asked if you want to save the file.
Now create a password for Samba so you can see your share from other machines, by running:
From now on you will use your Pi username and this unique Samba passsword to access the samba share/disk.
Allow HDD to idle when not in use
If not built into the HDD itself, Samba will simply keep spinning the disk endlessly whether in use or not. In order to increase longevity of the drive, it's a good idea to allow it to spin down after a few minutes of inactivity. This is done via hd-idle, which will need to be compiled first:
wget http://sourceforge.net/projects/hd-idle/files/hd-idle-1.05.tgz
tar -xvf hd-idle-1.05.tgz
cd hd-idle ............................................... (this will put you into the folder's directory)
dpkg-buildpackage -rfakeroot
sudo dpkg -i ../hd-idle_*.deb
Measure CPU/GPU stats like temp, volts and speed.
You can easily do this with a simple bash script that uses built in Pi commands. First create a script - i'll call mine cpustats:
# CPUSTATS
# Prints the current state of the CPU's temperature (C),
# voltage (V) and speed (MHz) along with the GPU's temperature.
function convert_to_MHz {
let value=$1/1000
echo "$value"
}
function calculate_overvolts {
let overvolts=${1#*.}-20
echo "$overvolts"
}
cpu=$(</sys/class/thermal/thermal_zone0/temp)
temp=$(vcgencmd measure_temp)
temp=${temp:5:4}
volts=$(vcgencmd measure_volts)
volts=${volts:5:4}
if [ $volts != "1.20" ]; then
overvolts=$(calculate_overvolts $volts)
fi
minFreq=$(cat /sys/devices/system/cpu/cpu0/cpufreq/scaling_min_freq)
minFreq=$(convert_to_MHz $minFreq)
maxFreq=$(cat /sys/devices/system/cpu/cpu0/cpufreq/scaling_max_freq)
maxFreq=$(convert_to_MHz $maxFreq)
freq=$(cat /sys/devices/system/cpu/cpu0/cpufreq/scaling_cur_freq)
freq=$(convert_to_MHz $freq)
governor=$(cat /sys/devices/system/cpu/cpu0/cpufreq/scaling_governor)
echo "Temperature: $((cpu/1000)) C"
echo -n "Voltage: $volts V"
[ $overvolts ] && echo " (+0.$overvolts overvolt)" || echo -e "\r"
echo "Min speed: $minFreq MHz"
echo "Max speed: $maxFreq MHz"
echo "Current speed: $freq MHz"
echo "Governor: $governor"
echo "GPU Temp: $temp C"
exit 0
You can install many different packages to allow your Pi to do whatever you want it to - for instance PiHole ![]() which is a universal adblocker - the options are endless.
which is a universal adblocker - the options are endless.
...and remember
Don't just pull the power in order to power down your Pi. There are many processes that need to stop running safely and if anything is being written to the SD card, it may get corrupted with a loss of power. Instead it is much safer to type the following command instead:
Make clones of your SD card
This may be useful if you're doing a lot of changes to the OS or simply want a reliable backup.
First, insert the RPi's SD card into your mac. Now to find what number it has been assigned, type:
Some useful sites:
