
My AV Page
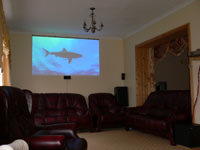
Here are a few photos of my current home cinema set-up. It's far from completed yet (cosmetically) and I still need to mount the screen correctly.
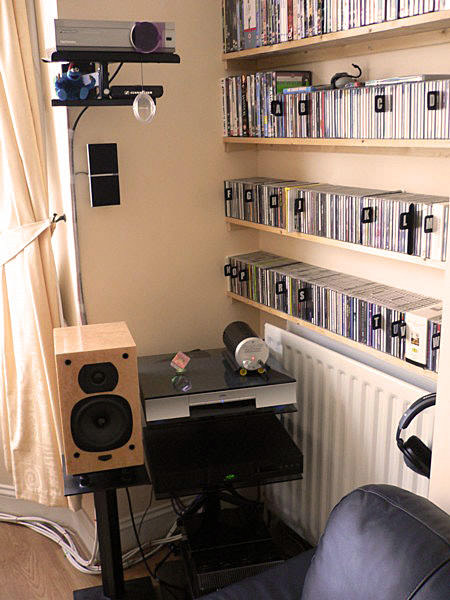 | ← Here is the set-up as is. You can see the home-made shelves behind (made by my bro) - perfect place to stick the CDs/DVDs. The connection for the | |
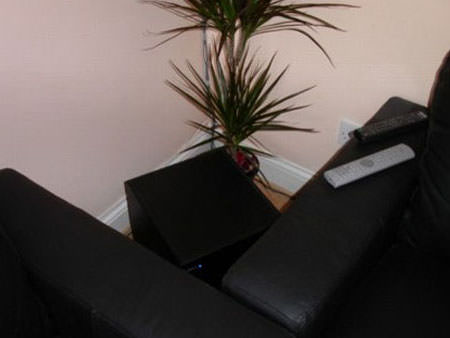
| Closer view of my | 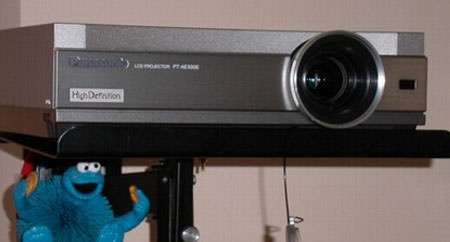 | |
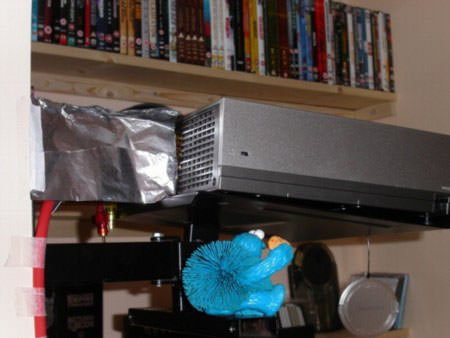 |  | |
| ↑ This shows how I've positioned the projector. It's done so that the fan exhausts to the bay window rather than the very close rear wall. The tin foil is straighter than it looks here and helps partition the air stream away from the wall further. It works very well, with virtually all the heat escaping to the window, and none straying to the rear wall. | ↑ The intake for the air also needs to be in free space with plenty of cool air around it. There is at least 1 foot between it and the shelves. | |
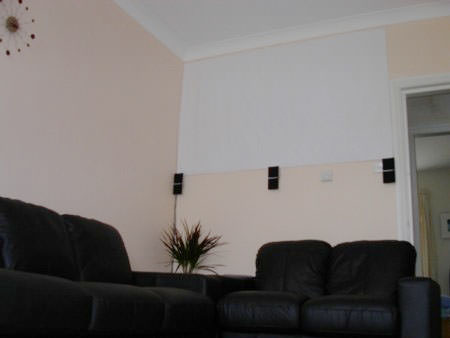 |  | |
| The screen ↑ was initially just a humble bed sheet. To give you a sense of scale, the sheet is 6 feet wide. A sheet is actually worse than the wall because it allows too much internal light dispersion. This means that because of the light scatter, dots become blobs and images that should be pin-sharp end up blurry and impossible to focus. It had to do at first because it gave better colour reproduction than displaying onto the pale apricot coloured wall. I now have a decent screen (see below). | ↑ The SubWoofer is hidden behind the 2 sofas, in front of the plant. It's about as powerful as a stand alone sub and I'm surprised that Jamo include this one in their speaker package - MUCH better than the poxy slimline ones you get in most complete DVD all-in-one systems. |
If you have a progressive scan capable DVD player, it can output a progressive picture via hdmi/component because it has its own on-board de-interlaceing chip. This is useful for connecting to special TVs/Plasma screens, which can then display it.
However, a projector already has it's own de-interlacer, so if you input a progressive scanned picture, it will be detected by the projector, which will then switch off it's own chip (bypassing it), so that you can see the DVD players efforts at de-interlacing.
In many cases, the projectors tend to have better de-interlacers than the current crop of sub £700 DVD prog scan players. I have switched off the de-interlacing chip of my Jamo (set output to component interlaced rather than component progressive) and am leaving my Panasonic projector to do the progressive job. Picture looks stunning...
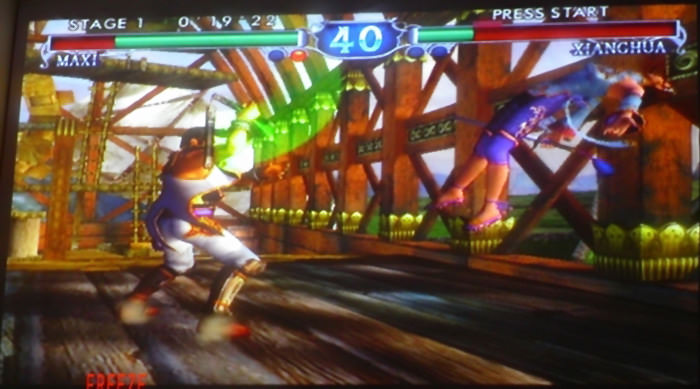
...even on a white bedsheet!
I then bought a new (6 ft wide) screen, so here it is on a proper ![]() DRH screen (gain=1)...
DRH screen (gain=1)...


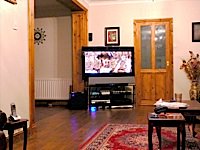
Addendum: Here are my new setup(s) in a bigger room: 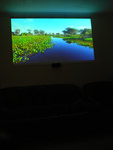
Avia Disc → Video Test Patterns
Lastly, you need to set up your home cinema correctly using something like the 'Avia Guide To Home Theater' dvd (you can buy this from the internet). Remember to allow the projector to warm up for 30min before adjusting/setting levels. As the test disc has over 2000 menus, I've included a brief "what menu to use and how to get there" by typing out menu/submenu names in italics after arrows. Try to adjust the settings in the order shown.RGB Contrast / Brightness Grey Scale & Levels → Grey Steps & Ramps → Vertical / Horizontal 10 IRE Bars
Adjust Contrast RGB with High IRE's (lighter bars) and Brightness RGB with Low IRE's (darker bars), until all bars are grey with no overall hint of r/g/b
White Level (Contrast, Picture) Grey Scale & Levels → Black & White → Needle Pulses
Set level so that L bar is visible and R not, then ↓ by 1 (so R barely visible).
Black Level (Brightness) Grey Scale & Levels → Black & White → Black Bars
Set level so that R bar is visible and L not, then ↑ by 1 (so L barely visible).
REPEAT the white/black cycle again to make fine adjustments.
Sharpness (Peaking, Detail) Resolution → Sharpness
1st decrease saturation to get a black and white picture.
The stripe sweep at the top and the blocks of stripes at the bottom should all have as even an intensity as possible (so no patchiness). Also, False outlines in the central black lines and diagonal ones are gone.
Saturation (Colour, Chroma) & Hue (Tint) Colour Adjustment → Standard Colour Bars
Split = Look through each of the filters and adjust Sat/Hue to match those colours with the neutral grey bars.
NEXT:
Look through the blue filter → Blue Bars.
The extreme lateral blocks labelled saturation should not be flashing (should look solid). The medial blocks labelled hue should not be flashing (should look solid).
Also look through the red filter ( → Red Bars) and green filter ( → Green Bars). ALL should approximate to the same Satur/Hue.
REPEAT the whole sat/hue cycle again to make fine adjustments.
→ Special Tests follow:
Colour Decoder Check
Look through each filter and see which corresponding block matches the background (should be 0%)
Gamma (& Y/C Delay)
The brightness of the square that matches the background is the Gamma (ideally 2.2-2.5), (& check delay, which cannot be altered).
Overscan & Pixel Cropping
Should see outside 5% of the outside edges ideally. Alter the POSITION of H-pos and V-pos to compensate (stored independently for each input type - set aspect to "16:9" [not "just"]).
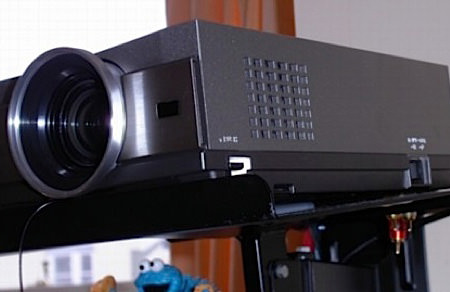
The following are an example of my settings for my PT-AE500E (Resolution 3(RGB)x16:9 panels 1280x720 (921600 pixels = HDTV / DVI-D) 16,777,216 colours):
| Memory 1 AVIA 625i PAL | Memory 2 AVIA 525p NTSC | Memory 3 750p/HDTV50/HDTV60 HDMI |
| Con -4 | Con -4 | Con +3 |
| Bri +1 | Bri +1 | Bri +3 |
| Col -12 | Col -10 | |
| Tin +1 | Tin +2 | |
| Sha -1 | Sha 0 | Sha +3 |
| H-pos 0 | H-pos -11 | |
| V-pos 0 | V-pos +2 |
Keep colour temp = 0, NR = off, Fan Control = Normal, Lamp Power = low, and no FLW a036 filter in place. Keystone Horizontal= 0, Vertical= 0
For the Secret Menu, hold down SELECT in the OSD menu. All Gamma's (High, Mid, Low) set to 0.
| Flicker (DESK/CEILING) HDMI | R 26 2A | G 2B 2E | B 2A 31 |
| Contrast | R 0 | G 0 | B 0 |
| Brightness | R 0 | G 0 | B 0 |
Sound Settings
Use a digital/analogue Sound Level Meter for this. It should be set to 'SLOW' response, 'C' weighting, and 'manual 60' ranging (i.e. measuring 60-90dB). For the a305pdd 5.1 speaker set the frequency ranges are:Satellites = 170Hz → Xover @ 3kHz → 20kHz
Subwoofer = 45Hz → set Xover to slightly below the penultimate notch (which is 174Hz) and the level to just below whatever causes distortion (which ends up as 1½ notches above '∞' in my case).
Set the systems 'Acoustic Setup' to "Jamo Reference" (NOT Neutral/Dynamic).
Place the meter where your head is with the orifice perpendicular to the plane of your ears (i.e. pointing upwards). With the test tone (either from the Jamo 'setup' menu or the AVIA test disc), alter the individual speaker levels until each speaker reads 85dB.
It's easier to start by setting the centre channel level to 0 and adjusting the master volume on the amp to give an 85dB reading. Now adjust the levels of the other 4 speakers up or down, whilst keeping the master volume the same, to achieve the same decibel value on the meter. So for example...
Audio Reference Levels: Master Volume = 50 (in my case), to give a Meter reading = 85dB
| FL | CC | FR | RR | RL | SW |
| +2 | 0 | 0 | +1 | +3 | 0 |
This is in my new room, where the left spkrs are partially obscured by curtains (hence the slightly higher values I need here).
Subwoofers are notoriously difficult to "read" by standard/non-professional sound level equipment...you will inevitably get a very innacurate result. This is why I've kept the level at 0 here and instead adjust the physical level knob on the back of the sub to one "just below" distortion (i.e. manually as mentioned above).
As per the piccies above I then upgraded my setup with a ![]() Pioneer PDP-LX5090 50" plasma screen,
Pioneer PDP-LX5090 50" plasma screen, ![]() Yamaha YSP-40D soundbar (coupled to a
Yamaha YSP-40D soundbar (coupled to a ![]() BK Electronics XLS200 10" sealed Active SubWoofer via a
BK Electronics XLS200 10" sealed Active SubWoofer via a ![]() homemade Subwoofer Interconnect) and
homemade Subwoofer Interconnect) and ![]() LG BD390 bluray player.
LG BD390 bluray player.

My current setup consists of a ![]() Samsung 65" QD-OLED with accompanied HW-Q930D 14 speaker surround sound setup which works together with the 8 TV speakers to give a 17.1.4 Atmos sound system. I have also switched the OEM sub with my own sub which I upgraded to a
Samsung 65" QD-OLED with accompanied HW-Q930D 14 speaker surround sound setup which works together with the 8 TV speakers to give a 17.1.4 Atmos sound system. I have also switched the OEM sub with my own sub which I upgraded to a ![]() BK Electronics P12-300SB-PR 12"+12" subwoofer which gives an effective surface area of a 17" cone. In order to control room modes, this is being fed by a
BK Electronics P12-300SB-PR 12"+12" subwoofer which gives an effective surface area of a 17" cone. In order to control room modes, this is being fed by a ![]() DSPeaker 8033 Anti-Mode Processor (that has it's own
DSPeaker 8033 Anti-Mode Processor (that has it's own ![]() Breeze Audio 12V LPS) via a 75Ω LFE cable. I have a Media Server on my
Breeze Audio 12V LPS) via a 75Ω LFE cable. I have a Media Server on my ![]() Apple TV for home cinema purposes.
Apple TV for home cinema purposes.
17th February 2004
